Search This Blog

Monday, May 30, 2016

Baked Ziti and Homemade Pasta Sauce

My husband says that the only thing I make well is Ziti. I even make it better than my mother, who can do no wrong when it comes to cooking in his book.
The secret is to flavor the layers. Ziti has so many plain ingredients - ricotta, sauce, pasta, that you need to make sure that each ingredient has flavor or else you are stuck trying to flavor the whole thing at once. Which never works, and you always end up over-salting, or a least I do...

So when I was trying to think up of different things I could make with my silicon cubes (can you tell they are a staple in my cooking?) it came to me that I should make Ziti! All I would need to do is cut out the salt and we would be good to go.

As I was putting together my ingredient list, I realized that I would need to make my own sauce. I did some research and found multiple people saying that not only is it SO easy to make your own sauce, but it is super cost effective. I obviously believed them, but then again I had multiple burning incidents this week, so I wasn't convinced that it would be that easy.

Anyway the final product was awesome, and I even got the husband to say, "yeah, the kiddo will like these." There you go - husband seal of approval.

This is a two part recipe. I was doing these both simultaneously (always a risky move), but they can be done separately. The sauce freezes perfectly and can be used in different ways!

Ziti and Homemade Sauce 

What you need:

Small Sauce Pot
Medium Sauce Pot
Stick blender (or regular blender)
Bowl
Colander
Silicon Cube Tray

Pasta Sauce

1 28 oz can  of peeled, whole tomatoes
1 small onion 
3 garlic cloves
2 tablespoons olive oil
Optional - handful of spinach 

Ziti 
1 cup uncooked alphabets pasta  
1 cup ricotta
1 cup sauce 
1.5 oz mozzarella shredded 
Seasonings you prefer 

Let's Bake:

- Start by making your sauce first. Grab your small sauce pot and add in your whole tomatoes
- Slice a small onion in half, and put it in your sauce pot
- Peel 3 garlic cloves (more or less to your liking) and add that to your pot too
- Add 2 tablespoons of olive oil


- Bring the sauce to a boil (I like to do this on a medium heat to reduce splatter) then reduce your heat to a simmer.
- With a watchful eye let your sauce simmer for 45 minutes*, or until your onion halves can be easily pierced through (the onions should look transparent)

Almost done! The onions are looking transparent 


*While this is happening, lets make our ziti!

- Preheat your oven to 350
- In a different sauce pot bring about 3 cups of water to a boil
- Measure out 1 cup of uncooked alphabet pasta (I was looking for pasting, but this is all my grocery store had) and add it to boiling water

How cute are these?

- Let the pasta cook for about 8 minutes - it is ok if it is a little al dente, because it will be going into the oven to cook
- While the pasta is boiling grab a bowl
- In your bowl add 1 cup of ricotta, 1.5 ounces of Mozzarella (or more, there is never too much cheese in a ziti) and your seasonings. I used pepper, garlic powder, and an Italian seasoning mix.
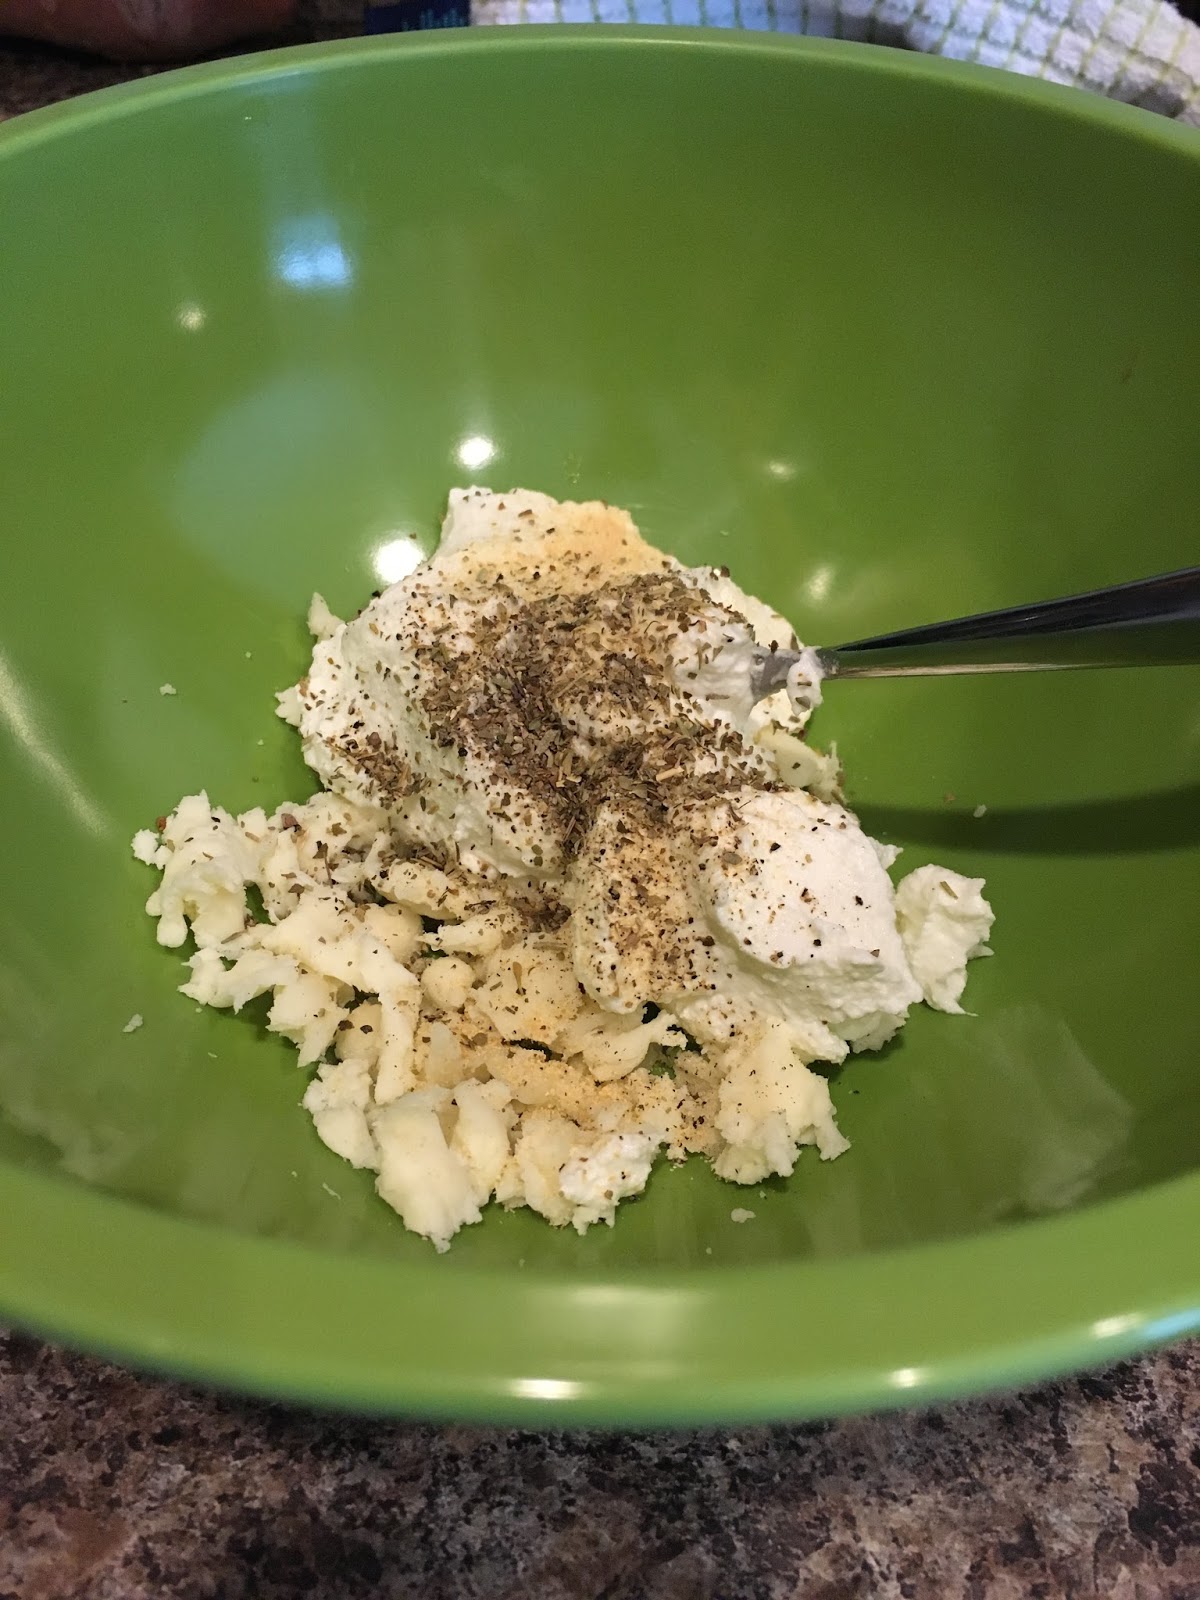

- Mix your ingredients together.
- Once your pasta is done use your colander to drain the water and add the pasta it to your cheese mixture*

*Heading back to the sauce

- At this point I threw in a handful of spinach and let it wilt down - I wanted to sneak in some extra veggies!
- You can remove the onion and garlic, but I wanted to extra flavor
- Once the spinach wilted I took my stick blender and blended up the whole sauce pan - BE VERY CAREFUL! THE SAUCE IS HOT!


- And that is it! Sauce is made!*

*Once more, back to the Ziti

- Add 1 cup of your homemade sauce (small applause) to your cheese and pasta mixture.
- Evenly distribute your mixture into your silicon cup


- Bake for 30-35 minutes, or until your desired doneness


These little morsels are a HUGE hit with my kiddo! I hope your kiddo enjoys them too!

Thursday, May 26, 2016

Broccoli Cheddar Quinoa Bites

My kiddo loves to eat. Loves it. He loves eating as much as he hates chicken. Hates it. I've pureed it, I've mixed it with delicious things, I've boiled it, shredded it, cubed it. I've hidden it in peanut butter (he actually licked the peanut butter off and threw the chicken over the side of his tray), I've even made it into a meatball. Nothing throws this kid off of the smell of chicken. That being said, I needed a alternative source of protein. He enjoys both the turkey and beef meatball, but I was getting bored of alternating them throughout the week, and I needed some lunch protein staples.
So I turned to Quinoa. High in protein, flavorless, and I had some laying around - all great things when it comes to needing to make a recipe.
I knew I couldn't just serve up some quinoa, it was too small for his pincers to grasp. But I bet I could bake it with some eggs and make some quinoa bites. So I gave it a try - and man was it a success! I hope your kiddo likes these as much as mine does!

Broccoli Cheddar Quinoa Bites 

What you need:

Blender 
Rice Cooker
Cheese Grater
Saute Pan 
Silicon Baking Cups

1/2 cup uncooked Quinoa 
1 cup water
1/2 cup ground up Broccoli 
Olive Oil
1/2 cup grated cheese (cheddar)
1 Egg
Spices 

Let's Bake: 

- Set oven to 350 

- In your rice cooker add your 1/2 cup of quinoa and 1 cup of water. Start your rice cooker and get everything else together

- In your blender place heads of broccoli and blend until really fine 


- Get broccoli into a sauté pan with a little olive oil, to prevent sticking, and cook on a medium heat. This just allows the broccoli to not be raw going into the oven. 
- While your broccoli is heating up grate your 1/2 cup of cheese
- When the broccoli is soft, add in your cheese and mix together 


- When your quinoa is done, add that to your broccoli and cheese mixture


- Once it is well incorporated, let it cool for a few minutes before adding in your egg. You don't want to scramble the egg! 


- Your mixture should come together pretty easily. If it is too loose you can add some more cheese! More cheese never hurt anyone! 
- Add in your spices. My kiddo likes pepper and garlic powder


- Pour mixture evenly into silicone cups


- Cook at 350 for about 25-30 minutes. I usually cook them until they pull away from the sides of the cups.

I hope you kiddo enjoys these! Packed with protein and veggies! They make a great lunch or snack. They hold up pretty well and freeze great! My kiddo likes to tear them apart limb from limb so be prepared for a lot of quinoa to get on your floor


Enjoy! 


Wednesday, May 25, 2016

Bread

As a self-proclaimed carboholic (with a conscious), I wanted to let my hungry kiddo enjoy the wonders of bread, but without all the chemicals that plague the modern day loaf.  So I had my mom dig out her old bread machine, which my dad was more than happy to get out of his basement, and I got to work.
Side note: If you don't have a bread machine, you should hit up some garage sales or purge your mother of hers. While it does take forever to get to the final product all you have to do is throw your ingredients in, set it, and forget it. Could there be anything better for a busy family? It's the crock pot of the bread world. Not to mention that your house smells fantastic for hours, and you feel pretty bad-ass when you tell some one that you made your own {delicious} bread!

I found one (ONE - can you believe it?!) baby friendly bread recipe, but it wasn't perfect. The first time I whipped it together, it came out pretty dense. It was well received - so I tried it again. This time I put my spin on it!

This bread has a great sourdough taste, and best of all it freezes really well - so no wasted bread! What can you do with this bread you ask? Anything! So far I've made french toast and grilled cheese! Both huge hits!


French Toast! Sandwich bread dipped in egg with cinnamon
Grilled Cheese with Zucchini - no idea how I achieved such a perfectly golden crust!

Sandwich Bread 

What you need:

Bread Machine
Large Bowl
Small Bowl

3 and 1/2 Cups of Flour
1 Teaspoon Yeast
1 and 1/4 cup Water
3 Tablespoons Olive Oil
1 Tablespoon Vinegar

Let's Bake:

- In your large bowl add your 3 and 1/2 cups of flour
- In a small bowl add your yeast and only 1/4 cup water*
*Make sure that this water is warm - I like to run my faucet until the water gets warm enough to keep my fingers in it, but not too hot.
- Let this small bowl sit while you make the rest of the bread, this is letting the yeast proof
- Add the remaining cup of water to your flour
- Add your Olive oil and vinegar
- Add in your proofed yeast
- Mix to combine slightly, just to get all the ingredients together


- Pour dough into the bread machine
- Set your bread machine to a white bread and for a 1-1.5lb loaf


- Now forget it and soon you will have a beautiful bread!


-Enjoy!


Tuesday, May 24, 2016

Oatmeal Cubes

Our hungry kiddo is very pleased with his new banana muffins. He loves feeding himself!
I've seen on plenty of lists that oatmeal is a great finger food. I love oatmeal, but whenever I severed him a little of mine it ended up everywhere. While I'm firmly in the camp of let kids get dirty, I thought there must be a better way to eat oatmeal.

I decided to find a recipe and give it a try. It's not much different from the muffins, so I knew they would be a hit! I borrowed and edited a bit this recipe from Feeding Finn

Blueberry Oatmeal Cubes

What you need:

Mini silicon baking tray (or mini muffin pan)  

1 Ripe Banana 
1 cup oats (Instant or rolled, I've used both)
1 Egg
1 Teaspoon cinnamon 
1/4 cup yogurt 
2 Tablespoons water
Frozen blueberries to your kiddos liking

Let's Bake:

Set your oven to 350

- Mash up your ripe banana in a bowl (make sure bowl is large enough for all of your ingredients)
- Add the cup of oats and stir until combined
- Add one egg and cinnamon and mix
- In a small bowl mix yogurt and water, then add to the rest of ingredients*
*for the record this was because I didn't have any milk like Feeding Finn calls for... so I "made" my own.
- Fold in your frozen blueberries

- Grease your mini muffin pan or grab your silicon baking tray
- Measure out and distribute your batter (I used one Tablespoon) to ensure even cooking


- Cook for 20-30 minutes 

These were going to a MOMs meeting, so I let them cool quickly and then popped them into a to go container and we were off! 

They were a huge success. They are easy to hold, and they firm up when they are cooking so they make minimal mess (always a plus). This can be upgraded for an older child by adding a little brown sugar or maybe even some peanut butter! The possibilities are endless!

Enjoy! 


Sunday, May 22, 2016

Teething Treat!

I don't know about your child, but my little guy's teeth are out to get him. The set doesn't come in at the same time! How rude! He will be all happy and go-lucky one minute, then manic and angry the next! All the while we are thinking, phew at least the teeth are coming in together - NOPE. So we are all put to the test for 2 weeks every time his pearly whites decide to make an appearance.

Our one source of comfort has been ice cubes shoved in the fresh food feeder. He loves it! He will keep it next to him while playing, and I can give it to him while I prep his meals so that his mouth is a little numb by the time his food hits the tray.

Recently, I saw an article on my Facebook about how cucumbers are a natural pain reliever, and are useful for our tiny tethers. I thought to myself "great, he loves cucumber!" and I stored this tidbit away.

On this one particular day, when his incoming teeth were getting the better of him, the lightbulb went off. What if I made cucumber ice cubes?! Ice to numb and cucumber to relieve the pain! As a good friend would say: "OH baby, I'm a genius!"

So I set out to make a teething treat! I hope this helps your little monster get over the teething blues!

Teething Treat

What you need:

Blender
Ice Cube Trays
(Space in your Freezer)

Cucumber
Any other fruits/veggies you want as add ins
Here is what I used:


- Half a cucumber (peeled)
- 2 Bell pepper tops
- Small handful of Spinach
- 4 Strawberries
- Handful of blueberries


Let's Bake (or blend):

- Peel and slice your cucumber
- Grab your blender
- Blend the spinach first
- Add in the cucumber and Bell Pepper
- Blend

- Taste what you have to determine if your fruit is enough to balance out your veggies
- Add in the Strawberries and Blueberries and blend
- Pour mixture into your ice cube trays*.
* I know that my ice cubes are too big to fit into my fresh food feeder, so I only filled my cubes up half way
The fruit made it prettier 

- Put your trays in the freezer and let sit for at least 2 hours.

Once they are frozen, remove them from the tray and store them in a freezer safe bag, and use them whenever your tiny teether could use a treat and some relief!


- Enjoy!

Saturday, May 21, 2016

Banana Muffin

When my easy egg breakfast dream was dashed, I decided to get us out of our breakfast rut once and for all. He was so over purees that he refused to eat anything off a spoon, and we were reduced to putting the puree down on his tray and hoping he got some in his mouth. On the plus side, we learned how to paint our high-chair tray.

I was in my pantry and something red caught my eye - it was a silicon mini muffin pan that someone had given me a long time ago. The lightbulb went off! This would be perfect for some breakfast muffins. I wouldn't have to use anything to ensure that the muffins didn't stick to the tray! Then I found out that my new favorite blog BLWideas had a yummy muffin recipe and I had my inspiration! 

What you need:

Silicon baking tray or mini muffin tray 
Blender 

1 Banana 
1 Tablespoon peanut butter
2 Eggs
4 Tablespoons baby cereal 
Cinnamon to taste 
Fruit of choice (frozen blueberries, fresh blueberries, fresh strawberries, mango...)

Let's Bake:

Preheat your oven to 350

- In your blender put in a peeled banana, nut butter of choice, both eggs, baby cereal, and cinnamon
- Blend until smooth
- Add in your fruit of choice (If you want your fruit whole, just fold it into the batter, otherwise blend away!)
- I used fresh blueberries in this batch
- Measure out equal parts* batter into your silicon pan, or greased tray (I used one tablespoon)
* This is important to guarantee even and equal cooking - you don't want to undercook these, especially with the eggs involved.


- Pop into the oven and cook for 20-30 mins (I cook them until the muffin pulls away from the silicon, and then I panic that they aren't cooked through enough, make my husband eat one, then put them back in the cooling oven. I can't be responsible for food poisoning my baby!)
- Let them cool in their pan for as long as you can stand it. They tend to be fragile.
- I like to refrigerate them before serving. You can pop them in the microwave to heat them up, or serve them cold! Whichever your little one prefers.
- Try not to eat them all yourself :)


*Update* I recently blended in a handful of spinach, and they came out great! Now these bad boys hit the mark on everything - delicious and nutritious! 


Friday, May 20, 2016

Frittatas

I was so pumped to get the go ahead on eggs. After our 6 month check up we were cleared to try all allergens. Eggs, peanut butter, indirect dairy (dairy included in something but not straight up cheese or yogurt), and wheat were on the top of my list. We did it slowly, and took all the precautions to make sure we didn't have an allergic reaction.

We were in a breakfast rut. Pureed fruit mixed with pureed vegetable and some cereal. BOOOOOOOOOOOORRRRRRRING. I was so excited to get some eggs in the mix, and it was avocado season. I had visions of scrambled eggs and avocado slices and some fruit. How easy is that??

Welp, my dreams were squashed pretty quickly. He hated eggs, and even worse - detested avocado. I could have cried! Who doesn't like avocado??

But I kept at it. I offered scrambled eggs as often as possible, avocado too. I finally found out that avocado were acceptable if they were baked, (recipe to come!) and eventually he warmed up to them fresh from their peel.

Eggs, however, took some getting use to. He would eat them if incorporated into something like a muffin or the meatballs, so I just had to get creative!
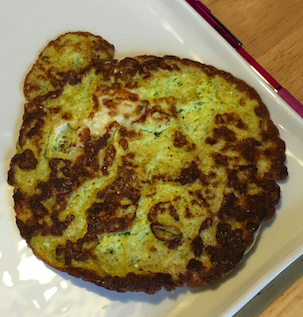
One busy weekend morning, I was in the process of forcing him to eat scrambled eggs again, and I left them on the stove too long. They weren't [too] burt yet (phew) but I had accidentally made a frittata. I said to myself, what the hell, let's give this a try.  HE LOVED IT!


I was in shock. He refuses to eat scrambled eggs, but here he is wolfing down eggs, just in a different shape. My shock wasn't long lived, because every other time I offer him this it's a hit or miss. Oh well, we can't all love everything. 

Frittata 

You will need:

Small frying pan 
Cheese grater

Olive Oil 
1 egg
Zucchini (or other vegetable of choice - I've done spinach as well)
Cheese if you like (I've done mozzarella and parmesan) 

Let's Bake: 

- Get your pan on the stove and heat it on a medium heat (I know you are doing 500 other things at the same time, so this minimizes your chances of burning)
- Add olive oil. I usually put enough to cover the pan 
- Grate zucchini into a bowl 
- Add egg to bowl and whisk together 
- Pour mixture into hot pan (with oil)
- Let the egg mixture set and cook before flipping to allow the other side to cook
- Allow frittata to cool and cut into fingers or cubes
- Hope baby likes it

Enjoy!

Spinach and parmesan frittata that he pretended to like