Search This Blog

Showing posts with label Salt Free. Show all posts

Thursday, September 8, 2016

Zucchini Bread Pancake

Breakfast is a great meal to sneak vegetables into. Our kiddo loves scrambled eggs, little does he know that they are packed with shredded zucchini or spinach. I wanted to spice up breakfast one weekend and I thought how can I sneak some veggies into a pancake? This is what I came up, I'm thinking of doing a carrot cake variety too!

What you need:

1 cup flour
1 tablespoon cinnamon
1 tsp baking powder
1 egg
1 cup milk
1 tablespoon melted butter
1 cup shredded zucchini
Unmelted butter for cooking

Skillet
Shredder

Let's bake:

- Start by mixing together your dry ingredients
- In a separate bowl mix together your wet ingredients
- Add your wet ingredients to your dry ingredients


- If your batter seems thick, make sure you added all the ingredients. My batter was really thick, and it was because I forgot to add the eggs
- Now shred your zucchini, I was aiming for a cup, but I was a little under, and add it to your batter 


- Butter your skillet and measure your batter onto the skillet


- You know they are ready to flip when they start to bubble


- Once they are cooled they are good to serve


Things to be aware of:
1. The cinnamon makes the pancakes have a "whole wheat" look, so if you have a picky eater, I would put less cinnamon into your pancakes. 
2. My kiddo doesn't seem to care that the pancakes have green flecks in them, but if you have a visual eater, I would recommend using a very fine shredder, and even peeling your zucchini prior to shredding to eliminate the green color showing. 

Enjoy!


Thursday, July 28, 2016

Granola Bars

I love granola bars. The chewy one preferably. The crunchy ones are just one mistake away from being granola, and then I'm going to need yogurt or milk, and that is a whole thing. Especially for a kiddo. So soft and chewy granola bars are the way to go for us!

I do have to confess. The first time I made these I made the mistake of putting the oats in first, then my wet ingredients. And I over estimated the amount of oats that I needed, so I was stuck playing catch up with my wet ingredients, and I just ended up with a crunchy granola bar. While my kiddo could have cared less, and loved eating his granola bar, I had a huge mess on my hands. I needed to find a way to keep this snack intact - for my own sanity, and so more than a crumb got in my kiddos mouth at a time.

Here is my final recipe. I am much happier with it, and my kiddo can't get enough of them! They keep fantastic in a plastic bag, and freeze even better. My kiddo even eats them frozen (which gives me more than two seconds before he needs a second one!)

What you need:

Small sauce pan
Large Bowl
3 quart Corning ware baking pan (that's what the bottom says)
Parchment Paper
Pizza Cutter
2 cups Oats
1 cup Peanut butter
1/2 cup Date Paste (or honey if your kiddo is old enough)
2 TBSP water

Let's Bake

- Set oven to 350
- Into a large bowl measure out 1 cup of your oats and set aside.
- Scoop out your second cup of oats, but DO NOT add it to the bowl.
- In a small sauce pan, and your 1/2 cup of date paste and your cup of peanut butter and melt on medium heat.

- Constantly stir the mixture. You will be stirring for longer than you think necessary. This is when you add in your water slowly if you feel that they mixture is seizing. I added in one tablespoon at a time.
- You are looking for the two to combine, and then for the oils in your peanut butter to start to come out. Since we aren't using honey the texture is going to be a little thicker. I hope the picture helps


- When you have reached your desired consistency scoop it into your bowl with your one cup of oats
- Incorporate your mixture with the oats, then add more oats until your dough comes together completely*. 
*This means that all the oats stay in the mixture AND your dough stays together when you grasp it in your hand. 2 cups was enough when I did the recipe, but always be prepared for surprises. You can always add more oats - you can't take them out :(
- Once you have your dough, press it into a parchment lined dish - smaller dish for thicker granola bars
- I pressed raisins into mine, but they all fell out after. Maybe I will mix them in next time.
- You can go no bake with these and let them sit in the fridge before serving, but I cooked mine for about 20 mins to have them come together. 

- Let them cool, then pull the parchment paper out of the dish and cut with a pizza cutter!
- The finished product! I hope you enjoy them. My kiddo did! 

Monday, June 27, 2016

Cheese-It's (No added salt, no coloring!)

The other day I found myself finishing a box of cheese-it's. Every time I brought another handful to my mouth I was saying this is the last one. But it is never the last one, because, well, they are cheese-it's. Luckily I was snacking sans baby, but in retrospect, I probably would have eaten less because I wouldn't have enough time to snack. Anyway, after scanning the ingredient list, I figured I could do myself a favor and make my own cheese-it's.

The recipe is crazy simple, and baby friendly! I made sure to use white cheddar to avoid color additives, and grated my own cheese to nix those pesky anti-caking ingredients, like potato starch. Added bonus this recipe only has 4 ingredients. Four!

What you need:

Cheese Grater
Food Processor
Silicon Baking Sheet
Plastic Wrap
Flour for dusting your working surface
Rolling Pin
Cookie Cutter of your choosing (Smallest you have)

4oz Shredded Cheddar
2Tbsp Cold Butter
1/2 Cup Flour
1Tbsp Cold Water

Let's Bake:
- Grate your cheese
- In your food processor add your grated cheese, cold butter, and flour

- Pulse until you have a very fine dough

- Slowly add in your water until the dough comes together. I added in one tablespoon at a time

- The dough should stick together, and shouldn't fall apart when picked up
- Form the dough into a ball, wrap in plastic wrap, and let it chill in the refrigerator for about 20 mins
- After your dough has chilled, Set your oven to 350 degrees 
- Put some flour on your working surface and roll out the dough.


- The dough should be thin enough to see through. It you want to keep it thick, then your cheese-it's will come out puffier 


- Once your dough is rolled out to your desired thickness, use your cookie cutter to cut your cheese-it's out of the dough.
- I only had a piping bag tip on had so, that it what I used. But next time I'm thinking a pizza cutter might be a easier option. Especially since these don't look anything like cheese-it's, and I know that might make some kiddos say "no way!"
- Place your cheese-it's on your silicon tray, I used a tooth pick to add the center dot to make them more cheese-it authentic. 

- Put these bad boys in the oven for about 15 mins, they should crisp right up, so watch them if you have a temperamental oven. 


Don't these look great?! I had to remind myself on multiple occasions that these were for the kiddo, not me. I only made 3 dozen out of this, and froze the rest of the dough. I wanted to see if it froze well. It does. 
The second time I made them I didn't put the enter hole and I used a convection oven. I think the center hole kept them flatter and crispier, but I could be wrong. Either way my kiddo loves the crunch and the flavor. I store them in a plastic bag or tupperware in the fridge, and they retain their freshness, flavor, and crispiness!

Enjoy! 

Monday, June 13, 2016

Carrot Chips

Ever have that moment when you missed the mom newsletter a few weeks back, only to suddenly realize you've been happily doing a big "no, no"? Of course you haven't. There is no mom newsletter. This moment did happen to me the other day though, I found out that raw carrots are one of the "worst" things you can give to a baby. Well, my kiddo LOVES carrots. It was one of the first finger foods that we gave him (oops). He would just hold it and be so proud of himself! It was adorable. Now he shaves it down with his teeth until there is nothing left. Just a nub. What can we say - he enjoys it. Just goes to show you that all of us are incapable, right? Oh well...

It got me thinking that he would probable really enjoy a carrot in a softer form. So here it is - a carrot chip. Easy to hold and eat, and loved by all! He eats them warm or cold. So they are the perfect snack to have with us at all times. Bonus - simple ingredients! I'm not going to lie, they are a tad bit labor intensive. The first time I made them I kept saying to myself "he better like these," and "I'm not making these ever again, ... unless he likes them." Well, jokes on me. He can't get enough of them. So when I made them again I tried to stream-line the prep process. Hopefully, they are easy enough to make now, and you won't be cursing me under your breath when you make these.
I haven't experimented yet with adding more veggies or using just a different vegetable, but that is next. Maybe broccoli? Or brussel sprouts? Or cauliflower? And I bet that I can make them into more of a "cookie" by adding cinnamon!

What you need:

Vegetable Peeler
Food processor
Bowl
Cookie Scoop (optional)
Parchment Paper
Baking Sheet Pan

1 and 1/2 cups shredded carrots (about 12 oz)
1/2 cup cheddar cheese
2 eggs
1/4 cup oat flour

Let's Bake:

- Set oven to 350
- Peel your carrots

- Using your food processor grind up 1/4 cup of oats into oat flour
- Pour your oat flour into a bowl
- Using your food processor pulverize your carrots. It should look like you are an expert chef and know how to dice up your carrots into perfectly diced pieces.

- Throw your carrots into the bowl with the oats
- Next grab your cheese, cube it, and throw it into your food processor. If your cheese is pre-shredded or you want to shred your own cheese just skip this step and put your shredded cheese into the bowl with the carrots and oats
- Add in your 2 eggs
- Roll up your sleeves and get your hands dirty. They best way to work this dough is to get your hands in it!
- All the ingredients should come together easily, but not be too thick
**
- Now here is the labor intensive part. You take a cookie cutter and press a thin layer of your dough into it, then gently pull the cookie cutter away. This takes for-ev-er. Please feel free to do it this way.
**
- OR Using a cookie scoop (mine is pretty big) scoop some of your dough out, then split it into two balls and place on your cookie sheet with parchment paper

- Once that is done, go back through and press down each ball so it is more chip like

-Try to make all patties the same thickness, this way they will cook evenly
- Pro tip: when pressing your carrot balls down, start at the back of your tray, otherwise all of your chips will have an upward slop from where you tried to avoid hitting the unflattened ball behind it.

- Cook for 20-25 mins, or until the edges get a golden brown

Yum, golden deliciousness!
These freeze great, and I am very happy with my adjusted way of making them!

Enjoy!

Thursday, June 9, 2016

Spinach and Ricotta Pinwheels

Now that you have a delicious pastry dough at your disposal. It is time to put it to good use!

I jumped right in and made a pinwheel. My kiddo loves them. Currently on the short list of acceptable foods.

I won't waste anymore time, here we go!

Spinach and Ricotta Pinwheels 

What you need:

Rolling Pin
Hard Flat Surface to work on
Hand blender with bowl attachment, or blender
Small Bowl
Non-stick baking sheet

Pastry Dough
Flour to dust surface
2 Handfuls of Spinach
1/2 cup ricotta Ricotta
Spices
Egg for egg wash (optional)

Let's Bake

- Preheat oven to 400
- Dust your surface with some flour
- Place your pre made dough in the flour and use your rolling pin to flatten out the dough
You can see that the dough is thin, but not too thin that it will fall apart if you move it. Remember we are stuffing this dough! 
- Let the dough rest while you blend up your handfuls of spinach 
You want to make sure that the spinach is chopped up fine, but not into a paste
- In a small bowl mix together your 1/2 cup of ricotta (or more to taste) chopped spinach, and spices 
- Take mixture and spoon it on to your rolled out dough 
- Evenly spread mixture all the way to the edge of the dough 
I made these twice before posting - props if you noticed that the dough was different!
- Now this is where I made my mistake. I rolled my dough from top to bottom. I should have rolled it from left to right (referring to the picture) 
- This would have allowed me to have a longer amount of dough to work with and to cut up.
- Once you have your dough and filling all rolled up, let the dough chill for a few minutes in the fridge (another mistake I made, and I had my filling spilling out all over the place. Made this mistake twice, and they still come out fine, but I invasion that the dough will cut better - you will have to let me know!)
- Line your non-stick baking sheet with your cut pinwheels - mine were about 1.5-2 inches wide
- They will not rise so you can put them pretty close together 
- The first time I made these I didn't put and egg wash on them, and they came out fine. If you are looking to make a more eye appealing pinwheel, then I would suggest an egg wash. Looking at the pictures, I know which one I would want to eat - but kids [sometimes] aren't picky.
With egg wash
Without egg wash 

- Pop them in the over for 30-40 min
- Keep out what you need and freeze the rest. They freeze beautifully!


Enjoy!


Tuesday, June 7, 2016

Fresh Pastry Dough

I've been looking for vessels to put the kiddo's food in. He's ooooover everything that I've posted so far.  Luckily he still loves breakfast - scrambled eggs, french toast, oatmeal, muffins, and frittatas. Needless to say lunch and dinner have become very trying. We've lapsed into eating a lot of small meals though out the day. I think it is him trying to tell me he wants to be a little bit more independent, or maybe he's just too chatty - he keeps making his bits of food talk to each other instead of eating them. Whatever this little eating bump is, there has been some light. He loves these pinwheels! I have even been able to sneak some chicken into them undetected (shhhhhh).

I saw someone make pinwheels for their little kiddo, and I was sold. But I ran into that similar problem - pastry dough, while flaky and delicious, has too many ingredients in it for my kiddo. So what did I do? Put my bread machine back to work. I made a fresh dough, and then filled that dough with all sorts of yumminess.

Fresh Pasty Dough

What You Need:

Bread Machine

1/2 cup water
3/4 cup butter (unsalted)
2 1/2 cups flour

Let's Bake:

- First place your butter in the freezer for about 15-20 mins


- While the butter is chilling measure out a 1/2 cup of water and throw some ice in it


- Get your bread machine ready and measure out your flour
- The reason for the freezer and ice is because you want to preserve the buttery goodness for as long as possible throughout the dough process! This will give you the flakey quality that you are looking for.
- After 15 mins, cube up your butter and put it in the bread machine


- Add your 1/2 cup of ice cold water (leave out the ice)
- Add your 2 1/2 cups of flour
- Set your bread machine to dough and go about your business! This is a great nap time prep!
- Once the dough is done split it into two even balls
- I used one immediately for pinwheels, and froze the other 


This first dough I used came out a bit dense. I will probably let it rest a little more before I use it again. When I used the frozen dough - it was perfect! Light and fluffy and a HUGE hit.
I will be using this again to make pizza, and maybe even cinnamon rolls!
Stay tuned for the pinwheels!

Enjoy! 


Monday, May 30, 2016

Baked Ziti and Homemade Pasta Sauce

My husband says that the only thing I make well is Ziti. I even make it better than my mother, who can do no wrong when it comes to cooking in his book.
The secret is to flavor the layers. Ziti has so many plain ingredients - ricotta, sauce, pasta, that you need to make sure that each ingredient has flavor or else you are stuck trying to flavor the whole thing at once. Which never works, and you always end up over-salting, or a least I do...

So when I was trying to think up of different things I could make with my silicon cubes (can you tell they are a staple in my cooking?) it came to me that I should make Ziti! All I would need to do is cut out the salt and we would be good to go.

As I was putting together my ingredient list, I realized that I would need to make my own sauce. I did some research and found multiple people saying that not only is it SO easy to make your own sauce, but it is super cost effective. I obviously believed them, but then again I had multiple burning incidents this week, so I wasn't convinced that it would be that easy.

Anyway the final product was awesome, and I even got the husband to say, "yeah, the kiddo will like these." There you go - husband seal of approval.

This is a two part recipe. I was doing these both simultaneously (always a risky move), but they can be done separately. The sauce freezes perfectly and can be used in different ways!

Ziti and Homemade Sauce 

What you need:

Small Sauce Pot
Medium Sauce Pot
Stick blender (or regular blender)
Bowl
Colander
Silicon Cube Tray

Pasta Sauce

1 28 oz can  of peeled, whole tomatoes
1 small onion 
3 garlic cloves
2 tablespoons olive oil
Optional - handful of spinach 

Ziti 
1 cup uncooked alphabets pasta  
1 cup ricotta
1 cup sauce 
1.5 oz mozzarella shredded 
Seasonings you prefer 

Let's Bake:

- Start by making your sauce first. Grab your small sauce pot and add in your whole tomatoes
- Slice a small onion in half, and put it in your sauce pot
- Peel 3 garlic cloves (more or less to your liking) and add that to your pot too
- Add 2 tablespoons of olive oil


- Bring the sauce to a boil (I like to do this on a medium heat to reduce splatter) then reduce your heat to a simmer.
- With a watchful eye let your sauce simmer for 45 minutes*, or until your onion halves can be easily pierced through (the onions should look transparent)

Almost done! The onions are looking transparent 


*While this is happening, lets make our ziti!

- Preheat your oven to 350
- In a different sauce pot bring about 3 cups of water to a boil
- Measure out 1 cup of uncooked alphabet pasta (I was looking for pasting, but this is all my grocery store had) and add it to boiling water

How cute are these?

- Let the pasta cook for about 8 minutes - it is ok if it is a little al dente, because it will be going into the oven to cook
- While the pasta is boiling grab a bowl
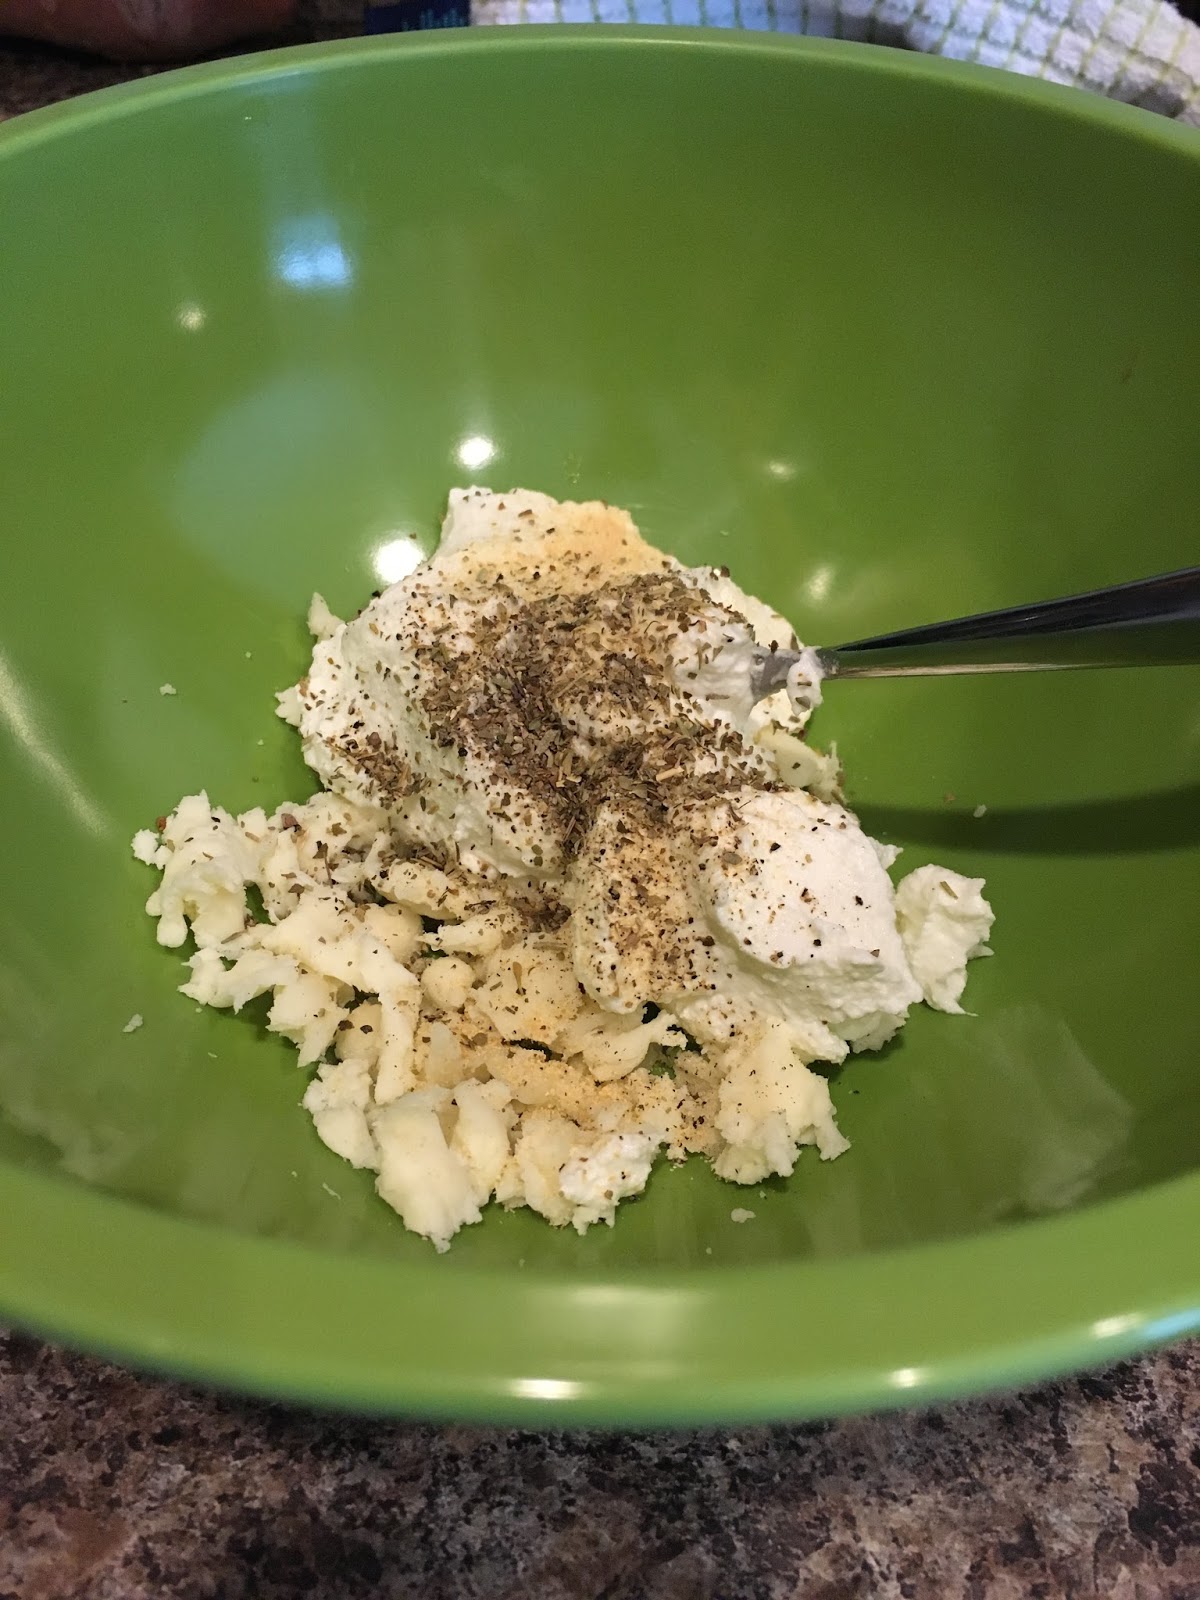
- In your bowl add 1 cup of ricotta, 1.5 ounces of Mozzarella (or more, there is never too much cheese in a ziti) and your seasonings. I used pepper, garlic powder, and an Italian seasoning mix.


- Mix your ingredients together.
- Once your pasta is done use your colander to drain the water and add the pasta it to your cheese mixture*

*Heading back to the sauce

- At this point I threw in a handful of spinach and let it wilt down - I wanted to sneak in some extra veggies!
- You can remove the onion and garlic, but I wanted to extra flavor
- Once the spinach wilted I took my stick blender and blended up the whole sauce pan - BE VERY CAREFUL! THE SAUCE IS HOT!


- And that is it! Sauce is made!*

*Once more, back to the Ziti

- Add 1 cup of your homemade sauce (small applause) to your cheese and pasta mixture.
- Evenly distribute your mixture into your silicon cup


- Bake for 30-35 minutes, or until your desired doneness


These little morsels are a HUGE hit with my kiddo! I hope your kiddo enjoys them too!

Thursday, May 26, 2016

Broccoli Cheddar Quinoa Bites

My kiddo loves to eat. Loves it. He loves eating as much as he hates chicken. Hates it. I've pureed it, I've mixed it with delicious things, I've boiled it, shredded it, cubed it. I've hidden it in peanut butter (he actually licked the peanut butter off and threw the chicken over the side of his tray), I've even made it into a meatball. Nothing throws this kid off of the smell of chicken. That being said, I needed a alternative source of protein. He enjoys both the turkey and beef meatball, but I was getting bored of alternating them throughout the week, and I needed some lunch protein staples.
So I turned to Quinoa. High in protein, flavorless, and I had some laying around - all great things when it comes to needing to make a recipe.
I knew I couldn't just serve up some quinoa, it was too small for his pincers to grasp. But I bet I could bake it with some eggs and make some quinoa bites. So I gave it a try - and man was it a success! I hope your kiddo likes these as much as mine does!

Broccoli Cheddar Quinoa Bites 

What you need:

Blender 
Rice Cooker
Cheese Grater
Saute Pan 
Silicon Baking Cups

1/2 cup uncooked Quinoa 
1 cup water
1/2 cup ground up Broccoli 
Olive Oil
1/2 cup grated cheese (cheddar)
1 Egg
Spices 

Let's Bake: 

- Set oven to 350 

- In your rice cooker add your 1/2 cup of quinoa and 1 cup of water. Start your rice cooker and get everything else together

- In your blender place heads of broccoli and blend until really fine 


- Get broccoli into a sauté pan with a little olive oil, to prevent sticking, and cook on a medium heat. This just allows the broccoli to not be raw going into the oven. 
- While your broccoli is heating up grate your 1/2 cup of cheese
- When the broccoli is soft, add in your cheese and mix together 


- When your quinoa is done, add that to your broccoli and cheese mixture


- Once it is well incorporated, let it cool for a few minutes before adding in your egg. You don't want to scramble the egg! 


- Your mixture should come together pretty easily. If it is too loose you can add some more cheese! More cheese never hurt anyone! 
- Add in your spices. My kiddo likes pepper and garlic powder


- Pour mixture evenly into silicone cups


- Cook at 350 for about 25-30 minutes. I usually cook them until they pull away from the sides of the cups.

I hope you kiddo enjoys these! Packed with protein and veggies! They make a great lunch or snack. They hold up pretty well and freeze great! My kiddo likes to tear them apart limb from limb so be prepared for a lot of quinoa to get on your floor


Enjoy!